
Trading tokens has become a standard practice for both traders and investors in the constantly changing world of cryptocurrencies.
You have come to the right place if you want to exchange your ATOK tokens for USDT! This tutorial will walk you through each step of the procedure, guaranteeing a successful and easy transaction.
Swapping Guides – Step by Step
Step 1: Open the Atok Swap Dweb App and Connect Your Wallet
You’ll need to access the Atok Swap Dweb application to get started. This platform allows you to swap your tokens seamlessly.
- Official Link: SWAP HERE
Once on the site, look for the option to connect your wallet. This is a crucial step, allowing the platform to interact with your cryptocurrency holdings.
Also Read: How to Withdraw from your ATOK wallet
Step 2: Approve the Wallet Connection
After clicking on the wallet connection option, you will be prompted to approve the connection. This step is essential for ensuring that the Atok Swap Dweb app can access your wallet and facilitate the swap.
Make sure to follow the prompts in your wallet application to complete this process.
Step 3: Enter the Amount of ATOK or USDT You Wish to Swap
Now that your wallet is connected, it’s time to decide how much you want to swap. The Atok Swap Dweb app supports both directions of the swap, meaning you can either convert ATOK to USDT or vice versa.
- Useful Tip For You: Double-check the current exchange rates to ensure you’re making a favourable swap.
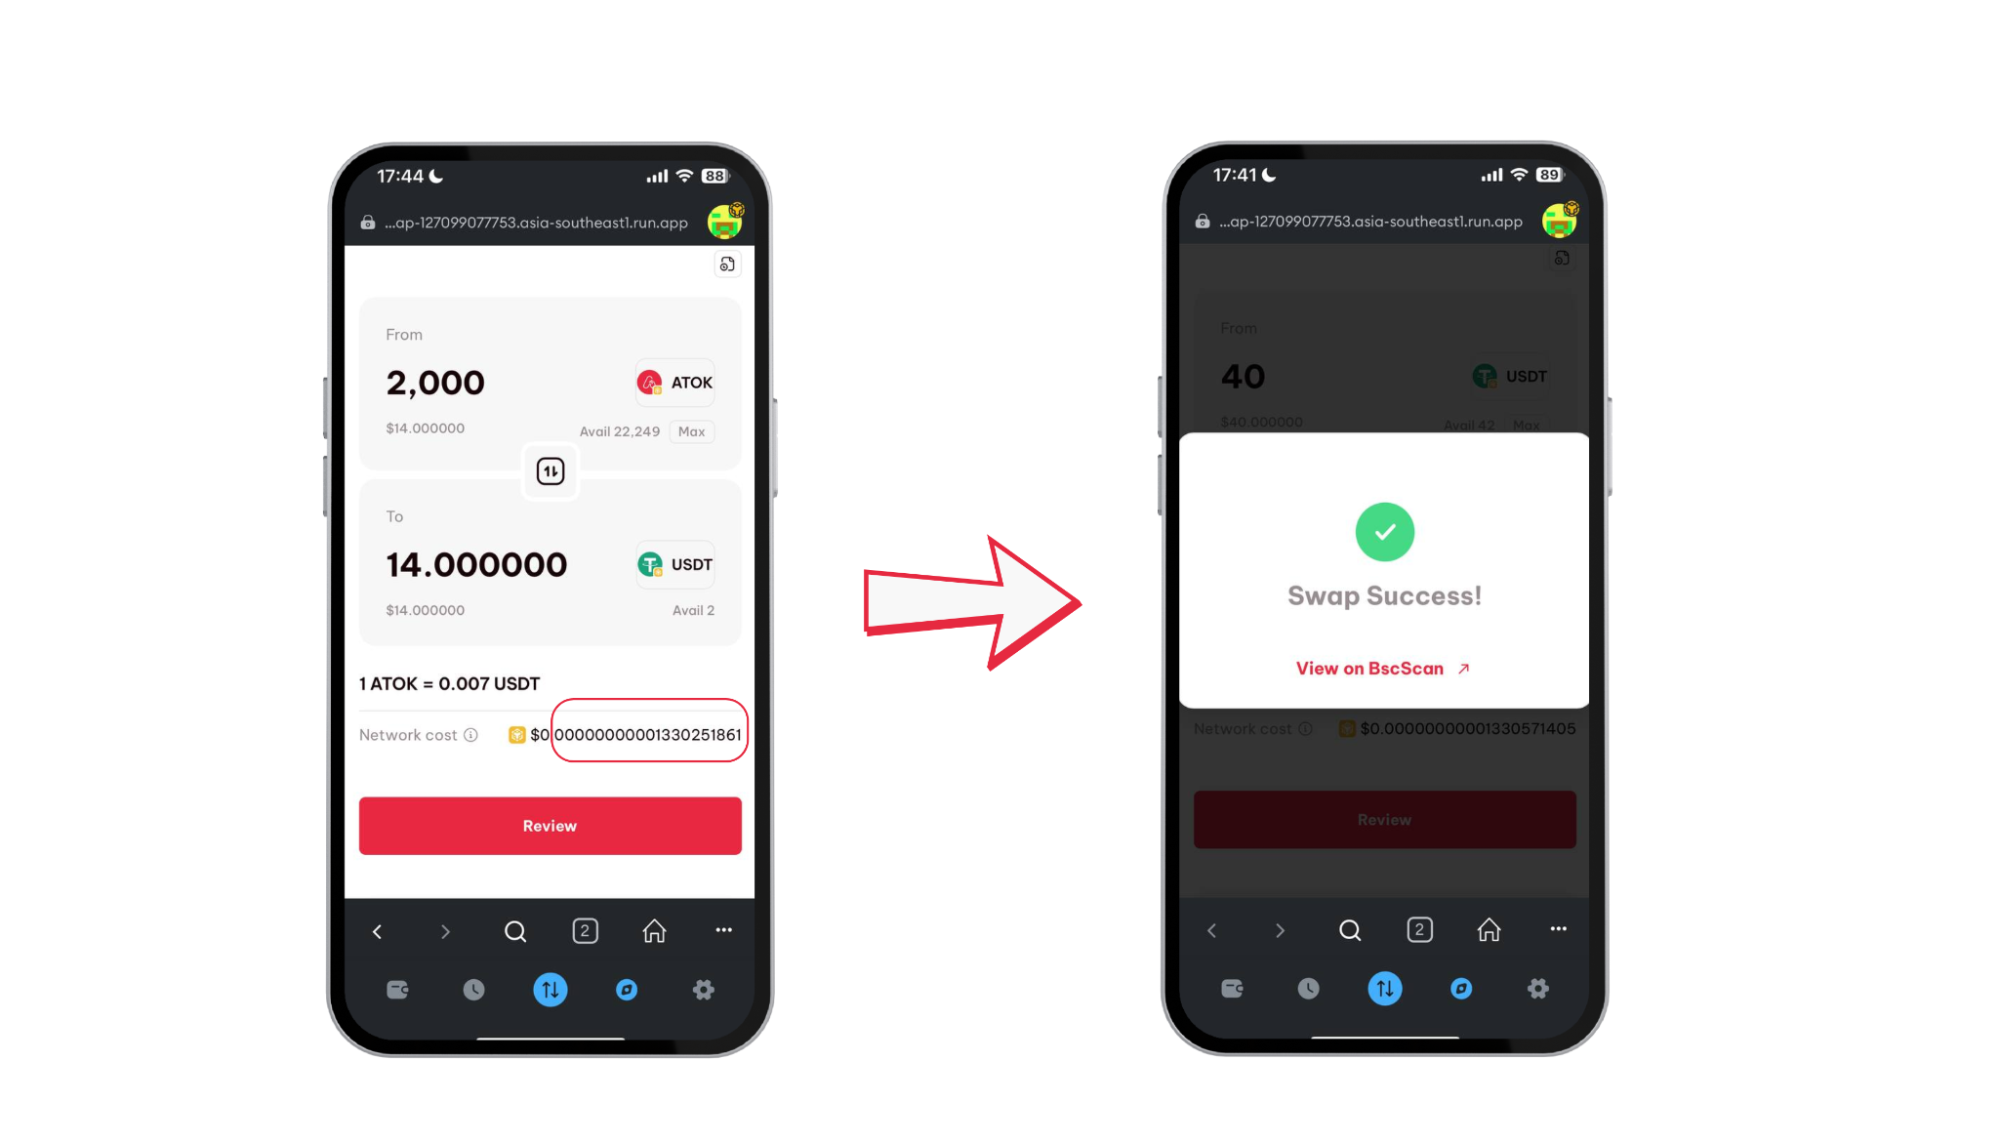
Step 4: Click “Review” to Double-Check Transaction Details
Before finalising your transaction, it’s always a good idea to review the details. Click on the “Review” button to see a summary of your swap, including the amounts, fees, and any other relevant information.
This step helps you avoid any mistakes and ensures that you are fully aware of what you are about to do.
Step 5: Confirm the Transaction by Clicking “Swap”
If everything looks good, it’s time to proceed with the swap. Click the “Swap” button to initiate the transaction.
You will then be prompted to confirm the transaction in your wallet. Make sure to read any messages carefully to understand the implications of the swap.
Step 6: Finalize with “Confirm”
After clicking “Swap”, you will need to finalise the transaction by clicking “Confirm” in your wallet. This step is crucial, as it officially processes the swap and transfers your tokens.
Once confirmed, you should see a notification indicating that the transaction is being processed.
2. Important Reminders
- Use the BSC (Binance Smart Chain) Network: Ensure that you are using the Binance Smart Chain network for all transactions to avoid any issues.
- Verify the official ATOK token contract address: Always double-check the contract address of the ATOK token to ensure you are swapping the correct token. This helps prevent any potential loss of funds.
- Have Sufficient BNB in Your Wallet: Make sure you have enough BNB in your wallet to cover gas fees associated with the transaction. This is essential for a smooth swapping experience.
3. Concluding Thoughts
Swapping ATOK to USDT on the Atok Swap Dweb app is a straightforward process when you follow these steps. By connecting your wallet, entering the desired amounts, and confirming the transaction, you can easily manage your cryptocurrency portfolio. Always remember to double-check details and ensure you’re using the correct network and token addresses.